The Companion system was introduced with the Blackwood Chapter in 2021. Companions are non-player characters who can aid you on your adventures throughout Tamriel. Once called to your side, these stalwart allies will assist you in combat.
Fighting alongside your Companion will improve their effectiveness and taking actions they approve of will build rapport. As you earn their trust and strengthen your bonds of fellowship, your Companion may share personal quests with you. You may also give them Companion-specific gear and customize them in a wide variety of ways, including setting their abilities, mounts, costumes, outfits, and more.
Your companion's level and combat selections carry account wide. Quest completion, rapport, costume, and mount overrides are determined separately for each player character. Companions are available to participate in most of the over-world content including assist in questing, defeating group bosses, completing dungeons, exploring delves, and more. However, companions cannot participate in PvP (Cyrodiil, Imperial City, or Battlegrounds), in Arenas (Maelstrom and Vateshran Hollow), and will be dismissed in player homes.
“The goal of the Companions system is to provide you with unique adventuring allies to explore the world with who will grow under your care and provide customizable combat support. By developing your Companion to be the perfect complement to your own playstyle, they’ll be able to help you tackle challenges that may have been just out of reach before and provide assistance when another player is not available to join you."
"Companions have abilities to fulfill all combat roles (damage, healing, tanking, and hybridization) in many common gameplay situations. However, they are not intended to replace or be as powerful as other players. If you prefer to tank, you may find a damage or healing-centric Companion to be an invaluable ally, whereas if you’re more focused on damage, you may benefit from a Companion configured as a tank to draw some attention away from you,” Philip Draven, ESO’s Lead Systems Designer.
In this Guide, we are going to cover:
For specifics on each companion, see the appropriate TAB at the top of page.
RESTRICTIONS and LIMITATIONS
In population-limited instances such as dungeons, group arenas (Dragonstar Arena, Blackrose Prison), and trials, each companion present counts towards the population cap as if they are player. Players will always take priority and companions will be auto dismissed as players zone in.
If the relationship between the character and their companion deteriorates into a very low rapport state, the companion may voluntarily unsummon themselves and be unavailable to the associated character for a time.
Companions will be dismissed if summoning an Assistant (Banker, Merchant, Fence) as you can only have one active at any given time.
Companion visibility may also be briefly suppressed in some situations where they are unable to navigate to your character, such as while swimming.
You cannot romance your companion. Just thought we needed to add that in here =).
(Top)
INTERACTION and CUSTOMIZATION
Companions can respond to a wide array of situations while adventuring with you, both in and out of combat. While they will always respond to the same critical triggers, you can adjust the frequency your companion will vocally respond by opening the [Settings] Menu, select [Gameplay], and adjust the [Companion Reactions] to Infrequent, Normal, or Frequent.
To engage with your companion simply initiate dialogue by clicking 'E' while facing them. You are presented with 2 options of dialogue;
- Let's talk about our partnership
- Companion Menu
Let's talk about partnership: Choosing "How do you feel about our friendship" gives you a summary of your relationship with your Companion. "Tell me something about yourself" gives you hints on what your Companion likes, and dislikes, that may affect their Rapport.
Companion Menu: This menu provides you with detailed information regarding status of your companion, as well as tools for adjusting the companion's combat behaviors and visual customization. From the Overview, you can see the Combat Level, the Outfit Style they are wearing (default or created outfit from an outfit station), their slotted skills, and Rapport. Under the Equipment tab, this shows the Companions Armor and Weapons you currently hold in your inventory as well as what your Companion has equipped.
Beyond the Companion Menu, dialogue with your companion is also a way to get to know them better and their responses will vary based on rapport, quest status, and other factors.
COSMETIC
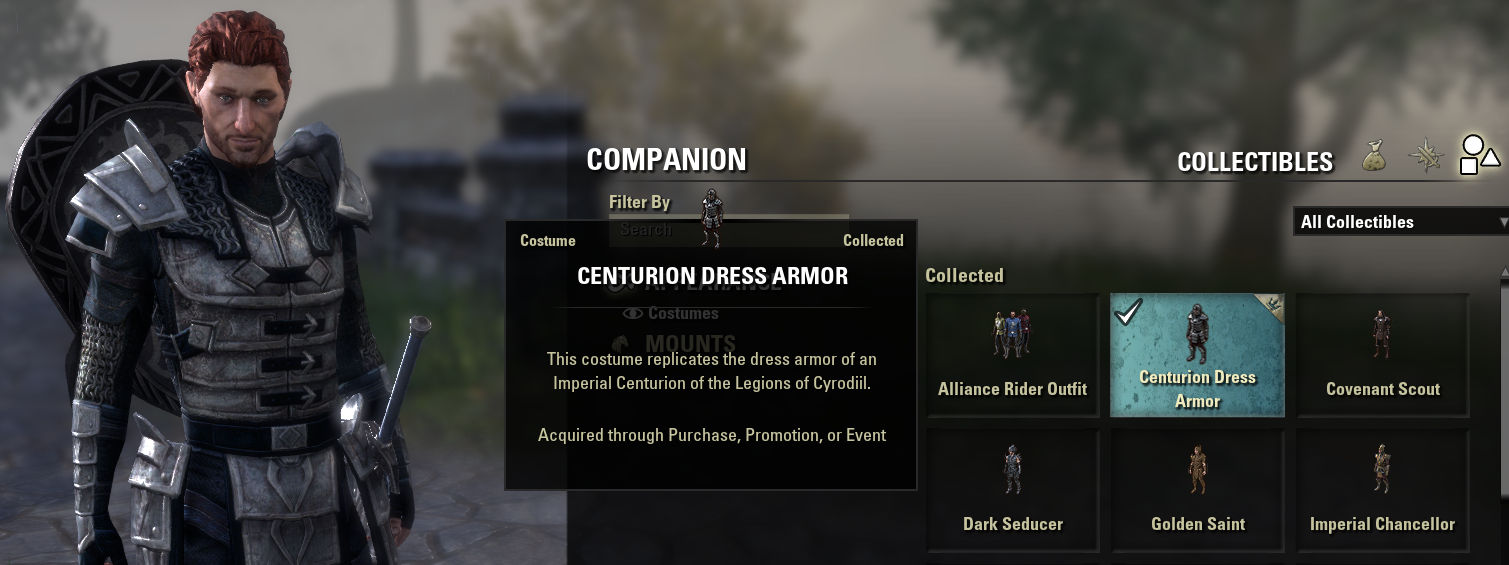
Companions can be customized using many of your own cosmetic collectibles. This includes mounts, costumes, and outfits. This is done by choosing the Companion Menu and then navigating to the Collectibles tab on the top-right.
Unlocked costumes may be applied through the Collectibles Tab, with any associated applied dyes being shared across your character and companion's appearance per costume. Visiting an outfit station allows you to configure a dedicated outfit slot, with each companion having a dedicated slot per account. This outfit can be activated through the overview screen of the Companion User Interface.
Note that a companion's head armor is automatically always hidden and will not be displayed regardless of equipment or cosmetic override settings. Additionally, a small subset of mount, costume and outfit collectibles may not be usable by the companion based on gender, race, or other restrictions.
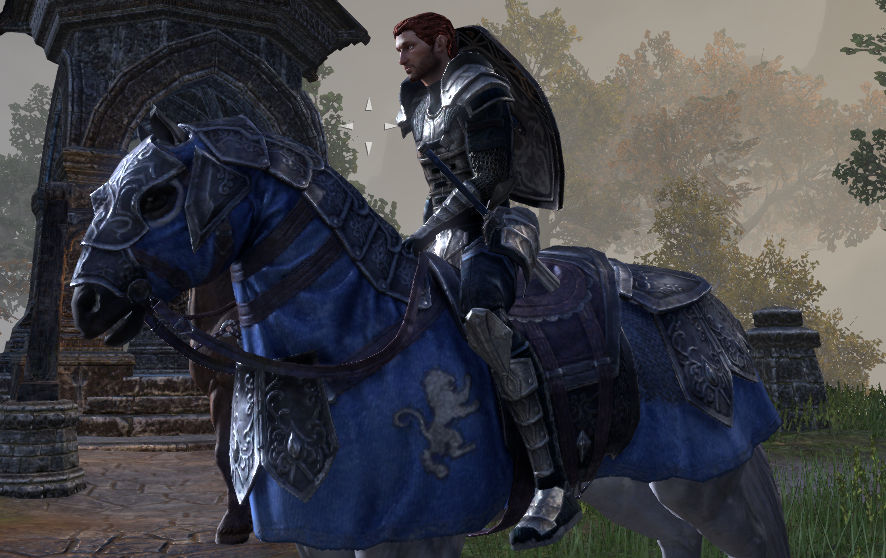
To change their Default Mount, it is done the same way as you change their appearance. Simply click on the Mounts option to view all mounts you have currently unlocked, and avail be to your companion.
(Top)
COMPANION EQUIPMENT
Companion equipment is distinct from player gear. Their equipment does not have levels, cannot be enchanted, does not require repairs and does not include a style appearance. You can purchase White companion gear from Weaponsmiths (1H, 2H weapons), Woodworkers (staves, bows), Armorers (Heavy Armor), Leatherworkers (Medium Armor), and Tailor (Light Armor) merchants throughout the world allowing you to customize your Companion from the start. You can find builds from three content creators on each of the Companions individual page. (See Tabs at top)
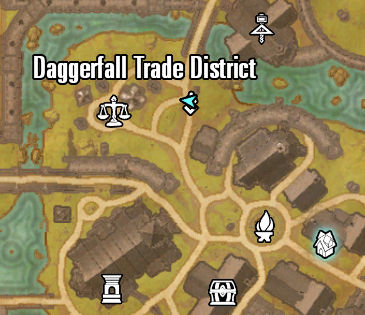
Note: The Armor and Weapon merchants are NOT the ones residing near crafting areas. You are looking for NPCs of the various trades; ex: Weaponsmiths, who reside in markets. An example would be in Daggerfall (Glenumbra) just North of the bank at the "Daggerfall Trade District".
Companion gear can drop from all enemies in the game; however, boss level enemies have the highest drop rate. Keep in mind that your companion must be summoned to obtain the loot. This includes:
- Delve Bosses
- Public Dungeon Bosses
- World Events (Dolmens, Abyssal Geyers, Dragonscours, Harrowstorms, Oblivion Portals, Volcanic Vents)
- World Bosses
- Normal and Veteran Group Dungeon Bosses
- Normal and Veteran Trial Bosses
This equipment can be traded, bought, or sold on the market. Fine, Superior, Epic quality companion equipment with traits is obtained from monster drops throughout the world, particularly from bosses.
Equipment above White quality also comes with companion-centric traits. See table below for descriptions and what the chosen Content Creators use in their builds.
| TRAIT | DESCRIPTION |  |
|||
|---|---|---|---|---|---|
| Quickened | Reduces ability cooldowns by X% | X | X | ||
| Prolific | Increases Ultimate generation by X% | ||||
| Focused | Increases Critical Strike Rating by X | ||||
| Shattering | Increases Penetration by X | ||||
| Aggressive | Increases Damage Done by X% | X | X | X | X |
| Soothing | Increases Healing Done by X% | X | X | ||
| Augmented | Increases duration of Buffs and Debuffs by X% | X | |||
| Bolstered | Reduces Damage taken by X% | X | X | X | |
| Vigorous | Increases Max Health by X% | X | X |
(Top)
RAPPORT
Companions have a strong personal preference which you can learn through dialogue and experimentation in the world. With your companion active, their opinion of you may raise or lower based on their observations. Rapport adjustments are displayed in real time in the loot stream (bottom right corner of your screen), and most actions have a cool down on how often it can be triggered.
As rapport increases or falls, various thresholds will be met, with corresponding changes in the companion's dialogue with you. The numeric value of a companion's rapport is usually hidden from a player (unless you are using an addon like Companion Frame) but can be inferred form the rapport status in the overview window of the Companion UI.
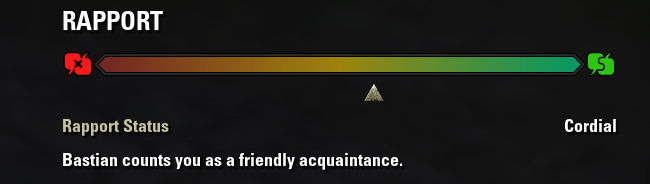
When you first meet a companion, they will have a Cordial status of 750 rapport. When Friendly is reached, the companion will be inclined to share personal information with you and ask you for your assistance with associated quests. When the lower tier is reached, the companion may choose to part ways with you for a certain amount of time. For individual companion likes and dislikes, see their appropriate page.
| MIN | MAX | STATUS | DESCRIPTION |
|---|---|---|---|
| 5000 | 5500 (max) | Companion | Companion regards you as their greatest ally and dearest friend. |
| 4000 | 4999 | Allied | Companion holds you in high esteem. |
| 2750 | 3999 | Close | Companion greatly admires you. |
| 1500 | 2749 | Friendly | Companion respects you as an ally. |
| 750 | 1499 | Cordial | Companion counts you as a friendly acquaintance. |
| -2499 | 749 | Wary | Companion tolerates you. |
| -2500 | -3999 | Irritated | Companion strongly dislikes you. |
| -4000 | ? | Disdainful | Companion feels nothing but contempt for you. |
(Top)
COMPANION COMBAT and PROGRESSION
Companions are level 1 when unlocked, with a limited set of ability bar slots and a maximum potential level of 20. Companions level up via experience gained with your character through combat or from some quest dailies. Experience increasing effects such as holiday bonuses and consumable boosters applied to your character will provide an indirect benefit to the companion as well. As companions gain combat levels, their health and overall power (which affects weapon and spell damage) increases automatically, additional ability bar slots unlock, and more class abilities become available. This includes an Ultimate slot and ability, which unlock at combat level 20.
Companions start with 2 Skill Slots unlocked at Level 1, then progress:
| Skill Slot 3: Unlocked at Level 2 |
| Skill Slot 4: Unlocked at Level 7 |
| Skill Slot 5: Unlocked at Level 12 |
| Ultimate Slot: Unlocked at Level 20 |
While Companions will always attempt to engage in combat when you are attacked, you can also direct your Companions to engage with specific targets or tell them to pull back. By default, those commands are the same as Pet commands which are holding down the "Y" key and then Left Click (mouse) to send them to attack, or Right Click (mouse) to have them disengage in battle. In addition, peforming a heavy attack will also cause your Companion to switch to your target.
Once your Companions reaches Level 20 and has unlocked their Ultimate, they will utilize it when it's available and conditions are met. You may, however, choose to have them wait until directed by you. The Companion Ultimate Auto Cast setting is in Settings, Gameplay. This will present, next to your skill bar, a new Ultimate Icon that can be used by a Hotkey.
If a Companion dies in battle, they can be revived by using a soul gem. However, any Companion who is still defeated at the end of combat will revive with a few seconds of the battle concluding.
Your Companion's DPS, tanking or healing rotation is based on the order of the skills arranged in their Skill Bar that's the same as a player's skill bar, if they have a valid target and meet any associated requirements of the ability. Companion abilities utilize a cooldown system, as opposed to GCD per cast for players, to determine frequency of usage.
Companion class skills resemble those of certain player classes, but organized into separate skill lines suiting damage, tanking, and healing. Companion armor skills are likewise broken down into light armor for healing, medium armor for damage, or heavy armor for tanking; this means that a companion who primarily uses spell damage attacks might be better equipped with medium armor, in contrast to player characters for whom light armor is optimal for spell damage.
Companion abilities do not require skill points to unlock and do not rank up or morph over time.
- Class Skill lines all increase at the same rate as each other, and like the combat level of the companion. Unlike player character class skill lines, slotting skill(s) from a line does not impact on the rate at which it levels.
- Weapon skill lines increase through combat experience based on the equipped weapon(s).
- Armor skill lines increase through combat experience based on the equipped weight of the armor on the companion. Unlike player armor skill lines, an armor skill level will only increase if 5 or more armor pieces of that weight are equipped, meaning only one armor skill can be leveled at a time.
- Guild skill lines increase through completing specific solo daily quests associated with the guild, for the active companion. Each solo daily quest is worth 50 experience each, and each level requires 100 experience to level. Guild levels have a max of 10.
- Racial skill lines do not include active abilities and are immediately applied based on the race of the companion.
General Skill Lines used by ALL Companions:
WEAPON SKILLS
DUAL WIELD
 |
Swift Assault - Companion floods an enemy with steel, battering them with five consecutive attacks that each deal X Physical Damage. |
 |
Spinning Steel - Companion launches themselves in a lethal spin, dealing X Physical Damage to nearby enemies. Deals triple damage to enemies below 25% Health. |
 |
Razor Cape - Companion envelops themselves in a ring of floating razors, dealing X Physical Damage to nearby enemies every 2 seconds for 8 seconds. The razors also shield them from attacks, reducing their damage taken by 20%. |
TWO-HANDED
 |
Staggering Swing - Companion slams an enemy with an upward swing and sends them flying, dealing X Physical Damage, stunning them and knocking them back 4 meters. |
 |
Sunder - Companion slices all enemies in front of them with a mighty swing, dealing X Physical Damage and additional X Physical Damage over time. |
 |
Sever - Companion spins around and strikes an enemy down, dealing bonus X Physical Damage. Used only when the enemy is below 25% Health. |
BOW
| Piercing Arrow - Companion plants a masterfully aimed arrow in an enemy's vital spot, dealing X Physical Damage. | |
 |
Trick Shot - Companion fires a burst of arrows in one shot, dealing X Physical Damage to enemies in front of them. Enemies hit are immobilized. |
 |
Viper's Bite - Companion shoots an arrow covered in Baandari poison at an enemy, dealing X Poison Damage and additional X Poison Damage over time. |
SWORD and SHIELD
 |
Provoke - Companion thrusts their weapon with discipline precision at an enemy, dealing X Physical Damage and taunting the enemy to attack them for 15 seconds. |
 |
Bashing Bulwark - Companion rushes an enemy and rams them, stunning them for 4 seconds. |
 |
On Guard - Companion bolsters their defenses, granting a damage shield that absorbs 25% of their Max Health for 6 seconds. |
DESTRUCTION STAFF
 |
Destructive Blast - Companion blasts an enemy with magic dealing X Magic Damage. Flame Touch knocks the enemy back 8 meters and stuns them for 2.5 seconds. Frost Touch taunts the enemy for 15 seconds. Shock Touch deals additional X Shock Damage to all other enemies around them. |
 |
Elemental Barricade - Companion slams their staff down to create an elemental wall in front of them, dealing X Magic Damage over 8 seconds. |
 |
Arcane Nova - Companion releases a surge of magic to enemies around them, dealing X Magic Damage. Fire Nova applies the Burning status effect. Frost Nova applies the Chill status effect. Shock Nova applies the Concussion status effect. |
RESTORATION STAFF
 |
Mystic Fortress - Companion calls on their staff's strength to protect themselves or the lowest health ally around them, granting a damage shield that absorbs X Damage. Used when the Companion or ally is below 25% Health. |
 |
Rejuvenation - Companion shares their staff's life-giving energy, healing themselves and a nearby ally for X Health for over 8 seconds. |
 |
Mending Incantation - Companion slams their staff down to activate its blessing, healing themselves and allies in front of them for X Health. The blessing also grants X Spell and Physical Resistance. |
ARMOR SKILLS
LIGHT ARMOR
 |
Haste - Companion focuses their magical energies inward, resetting the cooldown of all their other abilities. |
 |
Flow (Passive) - Increases Healing Done by 1% for each piece of Light Armor equipped. Decreases the cooldown of Break Free by 5% for each piece of Light Armor equipped. |
MEDIUM ARMOR
 |
Vanish - Companion disappears in a puff of smoke, becoming invisible for 6 seconds. Used when below 50% Health. |
 |
Flexibility (Passive) - Increases Damage Done by 1% for each piece of Medium Armor equipped. Decreases the cooldown of Roll Dodge by 5% for each piece of Medium Armor equipped. |
HEAVY ARMOR
 |
Bulwark - Companion becomes an unstoppable defender, blocking and reflecting all attacks for 5 seconds. Used when below 75% Health while fighting a difficult monster. |
 |
Firmness (Passive) - Increases Healing Received by 1% for each piece of Heavy Armor equipped. Increases the amount of damage blocked by 1% for each piece of Heavy armor equipped. |
GUILD SKILLS
FIGHTERS GUILD
 |
Sniping Silver - Companion fires a Dawnguard Vampire Hunter's crossbow bolt at an enemy, dealing X Physical Damage. Deals double damage if the enemy is an Undead, Daedra, or Werewolf. |
 |
Ritual of Salvation - Companion brands the earth underneath them with a rune of protection for 8 seconds. Standing within the rune reduces the damage they and their allies take by 20%. If the attacker is Undead, Daedra, or Werewolf the rune reduces damage taken by an additional 20%. |
 |
Biting Trap - Companion sets a sharpened blade trap in front of them, which takes 1.5 seconds to arm and lasts for 8 seconds. When an enemy triggers the trap they are immobilized for 4 seconds. If the enemy is an Undead, Daedra or Werewolf they take X Physical Damage. |
MAGES GUILD
 |
Starfall - Companion calls a comet down from the constellations to blast an enemy, dealing X Flame Damage. |
 |
Reverse Entropy - Companion envelops themselves and an ally with stabilizing magic, healing them for X Health over 8 seconds. |
 |
Parallel - Companion barters with Oblivion for power, generating 50 Ultimate. |
UNDAUNTED
 |
Crimson Font - The Companion conjures a fountain of blood to sustain themselves and allies around it, healing for X Health every 1 second for 16 seconds. Allies near the found can activate the Blood Funnel synergy, healing for 50% of their Max Health. |
 |
Savage Instinct - The Companion ignites the fires of hate in an enemy's heart, dealing X Magic Damage and taunting the enemy to attack them. An ally targeting the enemy can activate the Savage Implosion synergy, causing the enemy to implode after 2 seconds dealing X Magic Damage to them and other nearby enemies. Used when the enemy is not already taunted. |
 |
Skeletal Aegis - The Companion surrounds themselves with a whirlwind of bones, granting a damage shield for 30% of their Max Health for 6 seconds. While the damage shield holds an ally near them can activate the Bone Wall synergy, granting them a damage shield for 50% of their Max Health. |
(Top)